Monday, February 27, 2006


Interior Shots

Finally I was able to take some pictures of the interior. The other day I bought a bottle of Armor All, the one with UV protection, and I'd say the interior looks much better...or newer :) Had the floor vacuumed as well...cleaned up most of the dirt, grime, rust particles, pebbles, etc. under the seats...luckily no animal/insect infestation :) Also used those nylon zip ties to secure the speedometer and tachometer cables, which have been hanging close to the pedals. The dash and seats would need to be re-upholstered in the near future (underside of the seats have accumulated a lot of rust). I still can't get over the racing pedals...they really look nice along with the steering wheel! ;)

New Lap Belts

When I bought the roadster, it didn't come with the standard lap belts nor did it have an aftermarket 3-point seat belt...luckily no highway patrol guys were looking :) After having repaired/maintained most of the mechanicals in my SPL-311, it was now time to focus on the "safety" side or the lack thereof. I've always been partial to the purists side of restoration so instead of looking for a 3-point harness and even a racing one (5-point?), I raided a whole strip of auto supply stores in search of those illusive lap belts (I'm not planning to drag race the car anyhow...just planning for Sunday cruising within the legal limits). After several auto supply stores and hours of searching, I finally found something suitable. Most of the lap belts I found had poor quality straps (like the ones found in backpack straps...and poor quality ones at that!). The ones I bought were satisfactory in quality - "Autofriend" is the brand (probably made in Taiwan). I installed the driver side lap belt via the lug nuts opposite of each other (no drilling was done), but had to have the passenger seat removed at Autosport (the repair shop where I usually go to). At last, new lap belts installed... they compliment the seats too!

Friday, February 24, 2006


Next Up: Body Restoration

It's time to face the music...will have to have the rust cut out from the body (some rust in the engine compartment and several "alarming" holes in the trunk) and have it repainted (strip the paint, bondo, and primer first then apply the primer and bondo again, and lastly, paint with a generous coating of "Coca-Cola" red). Tomorrow I'll have to look for alternative shops where I can have these things done. Expenses for this part of the project will be a pain! I'll also have to look for a shop where I can have the bumpers re-chromed...some more pain on the way! Argh!

Wednesday, February 22, 2006


Speedometer

I finally got the speedometer up and running again! I bought a new speedometer cable down at the auto supply store (the old ones were stuck up) and had it installed. Went for a test drive...nothing on the speedo but zero! So back to the drawing board. I had the mechanic check the speedometer gear attached to the transmission and saw the culprit...the plastic gear has been shredded. I went to Nissan and found an eighteen tooth speedo gear for a five speed roadster (color code is blue) and bought it since there wasn't any gears left for the four speed. This will have to do...with a little bit of tweaking of course. The four speed speedo gear shaft is longer than the five speed gear so I had to go to the machine shop to have the necessary adjustments. I had the lower end of the four speed speedometer gear cut and attached to the upper end of the five speed speedo gear to get the right length and woala...an eighteen tooth four speed speedometer gear conversion. The speedometer works great...although I'm not sure about its accuracy. I might be driver faster than the speedometer actually registers. I'll have to have someone in another car pace me so I can know what my true speed is. Well at least it works!


Restoration Update (various pictures of the repairs made):

I had the original steel brake lines replaced (those attached to the calipers) as well as bought a pair of grease covers for the front bearings - even these are already in limited supply, I had to buy from two different auto supply stores. It turns out that the lines had been eaten away by rust and by just holding it with your hands you could literally disintigrate it! To make matters worse, the brake line fittings installed by the previous owner(s) weren't the correct length so there's always a constant leak of brake fluid. Luckily I have great mechanics! The new copper brake lines and correct fittings have been installed and ready for action.

While the shocks were being replaced, I also had the steering gear box overhauled. It turns out that the gear box didn't have oil at all and one of the bearings has already cracked due to the lack of lubrication! I had a hard time looking for the steering gear box bearing and the front and rear seals, but with perseverance it was all worth it. I had the gear box filled with Mobil HD90 oil (API-GL5). Luckily the internals of the gear box especially the worm wasn't damaged. Also had the steering pressure adjusted and now it's perfect! The play on the steering wheel is now down to around .75 of an inch (it used to be about 2.5 inches!).

I also had the idler arm brought down and had a new bushing machined (yes this isn't the original ones from Datsun where the bushings are made of rubber) from high density alloy (used for engine components). The new alloy bushing fits like a glove...no more slack! I think alloy bushings are even better and more durable than the rubber ones used in the original roadsters. Not only is the alloy bushing more robust, the fit around the shaft is more secure and firm thus less play on the steering wheel. Rubber VS. Alloy - I'll take alloy any day. Driving the roadster now is a real treat! No more playing catch-up and I noticed less vibration on the steering wheel. Worth every penny.

Tuesday, February 21, 2006


EMERGENCY BRAKE MECHANISM MISSING!

Does anyone know the machining specifications of the lever (please see picture of the lever with the blue background)? I plan to have it machined so I don't have to buy a new set of brake pistons. The brake drum picture at the bottom shows the lever in place - this is what's MISSING in my rear brake drums. Safety first!

Wednesday, February 15, 2006


R16 ENGINE

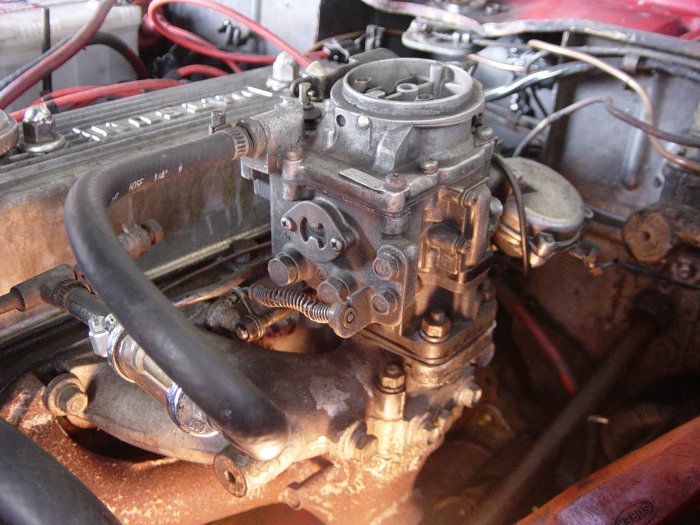
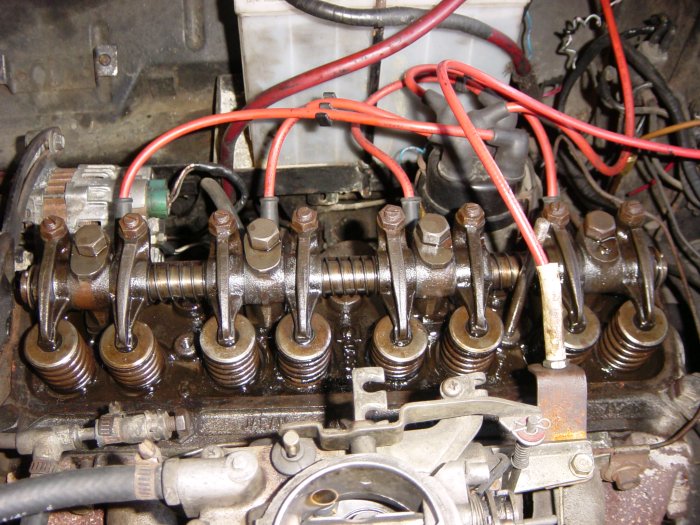
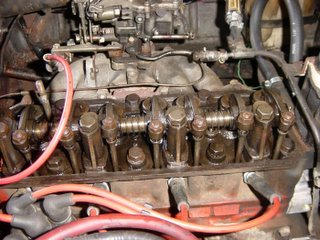
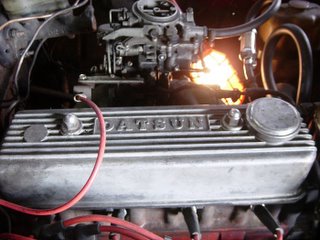
Here's some pictures of the engine, carb, and valves. As you can see, the carburetor has already been converted from a Toyota engine (possibly from a 3K)...found the original twin SU carbs, but the shop is selling it for P8k! (and the seller is still not sure if it's working!) So I'll stick with this carb for the mean time and so far the engine seems to be comfortable running with this conversion.

The valves and rocker arms look ok to me. I was expecting gunk and hardened oil on the valves, springs, etc. Although I'll have to flush the engine with 5W-30 or 10W-40 oil just to be sure on the next oil change.

Also had the leak in the exhaust welded up and had the new gasket applied with silicon Hi-Temp gasket maker to seal the header pipe. The welder added a one inch extension on the exhaust manifold down pipe to keep it from being stressed too much...he also welded the support bracket on the pipe, since it wasn't welded anymore. The engine now purrs like a cat and the exhaust note sounds balanced..."quietly loud" but not noisy. I hope the asbestos exhaust pipe gasket holds...this is my second one in less than a month!

Replaced the contact point and condenser (Bosch parts, but made in Japan - weird...the box seems older than me hehe), since the mechanic couldn't get the timing right...carb backfires even at high rpm - 4000-5000. After adjusting the carburetor and timing, the engine runs much smoother, but the mechanic still couldn't get rid of the low rpm backfires...most likely the converted carb is the culprit. Well, I can live with it. As long as it's reliable - I've heard that the twin SU's are a pain to synchronize. I also had the carburetor sprayed with carb cleaner (Whiz) to clean out the gunk and carbon deposits especially since I'm running the engine without an air filter (need to find a way to install an air filter without it hitting the hood!).
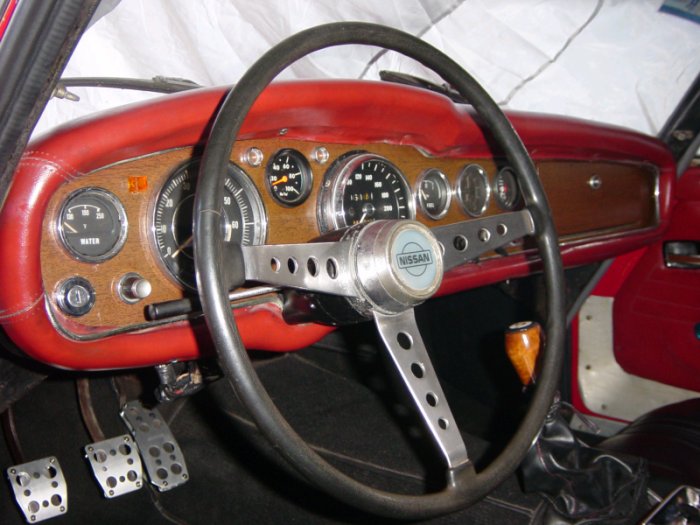
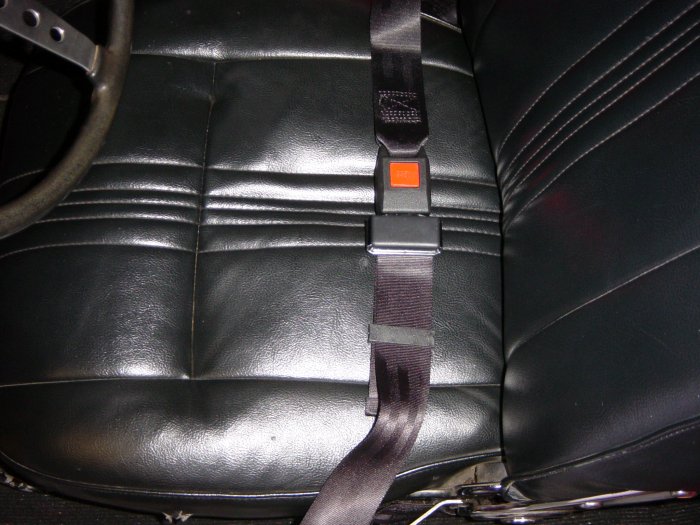
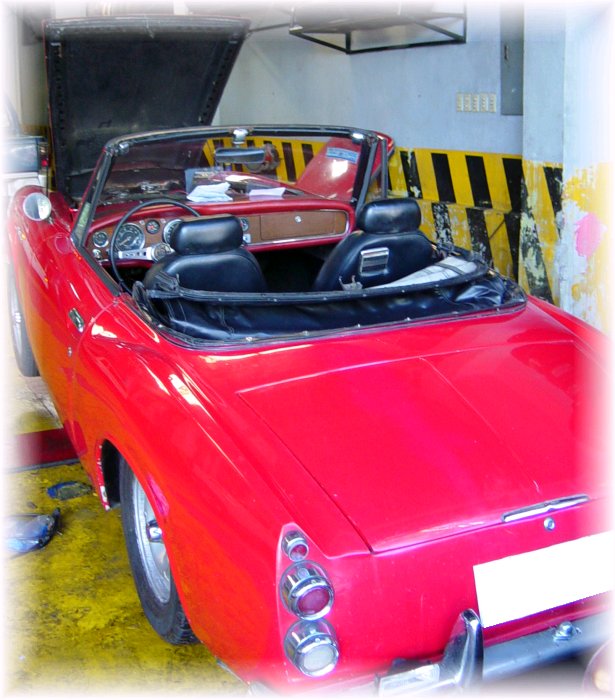
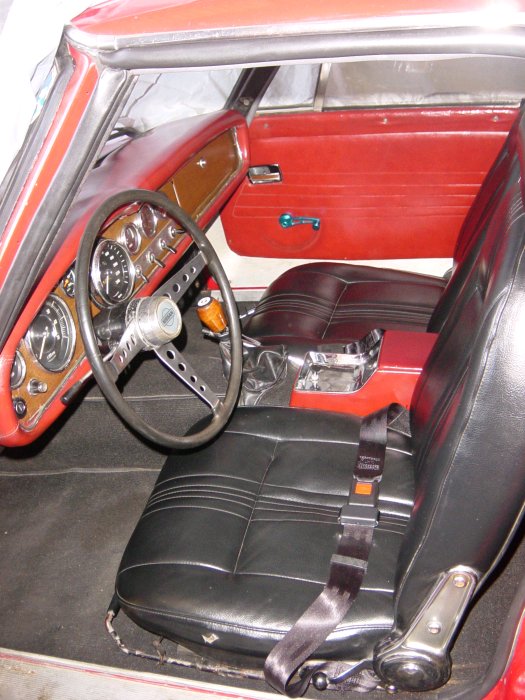
Tuesday, February 14, 2006

Datsun Fairlady Restoration Update


So here's an update of the restoration work (apart from changing the engine oil - reformulated Castrol Magnatec 10W-40 API-SM) - concentrated first on the mechanicals:
  1. changed the transmission and differential fluid - Mobil HD90 (API-GL5)
  2. replaced front brake pads (Kashiyama, Japan) - last stock at the auto supply store :)
  3. changed brake and clutch fluid - Whiz DOT 3 (I'd like to try out the fluids used by Mercedes Benz fanatics since they told me that these are less acidic - forgot the name...)
  4. replaced cooling system plumbing (upper and lower radiator hose, etc) and coolant (Whiz - planning to use Caltex Extended Life Coolant in the future)
  5. replaced water pump - OEM (original equipment by manufacturer)
  6. had all front end fittings greased; replaced some of the worn-out boots as well with a locally made one - equally hard to find these days
  7. overhauled radiator core - engine was running a bit hot
  8. rewired entire electrical system; new fuse box (Circuit, Japan), ignition switch (Torica, Japan), and added a customized battery warning light (I had the amp meter removed - to prevent car trouble specifically...a blazing internal fire! This was recommended by the electrician down at Systematic Auto Electrical)
  9. bought fog lamps (had a hard time finding the right sized ones - found one from DLAA), rear plate light, and reverse light; replaced sealed beam headlights (Stanley)
  10. brought down the gas tank and had it cleaned (full of "fermented" fuel!); now I only use Petron Blaze (97+ RON) or Shell Velocity (95 RON) unleaded gasoline - engine runs smooth
  11. had the carb adjusted (until now it's backfiring so I'll have to have the timing checked again and replace the contact points!)
  12. had the fuel filter cleaned using Whiz Carburetor Cleanner - very effective (still don't want to use those disposable "paper filter" types...not just yet)
  13. overhauled starter motor and alternator, had the bearings greased up
  14. replaced clutch plate and clutch cover (Asco, Japan) - had to remove the entire engine of course! - both NOS (new old stock) at the auto supply store
  15. replaced clutch release bearing (NTN, Japan...I think) - last stock yet again!
  16. replaced tranny oil seal
  17. replaced exaust pipe gasket and had an extension welded on the header to keep the muffler from being stressed
  18. replaced clutch slave (Nabco, Japan) and hose (the one on the roadster was already converted and leaky!)
  19. replaced front tires with Goodyear NCT5 (175/65/R14) and had all tires balanced
  20. replaced ignition coil with Bosch (word of advice - never buy Bosch coils that are made in "Brasil"!!! totally sucked! mine became some sort of goo in just 15 minutes driving! I'll be installing a Denso one instead with a resistor or another one from Bosch - the one made in Spain!)
  21. replaced spark plugs - NGK BP6ES
  22. replaced both radiator and reservoir caps (Fusion) - cooling system seems to be loosing pressure, now the temp seems to be cooler
  23. replaced front wheel bearings - inner and outer (Koyo, Japan) and both front shocks (Gabriel oil filled shocks - gas shocks are too stiff in my opinion, especially in Manila where the roads have HUGE potholes!) *I used Total's MP3 grease for the bearings, since my mechanic recommended this instead of the Mobil and Caltex counterparts as they seem to loose viscosity faster than the Total's in the warm climate that we have here; had the rear axle bearings checked and the mechanic seemed satisfied with its condition
  24. also had the rubber spring caps (upper and lower), the passenger side lower A-arm bump-stop (last stock at the auto supply store!), and the anti-roll bar bushings replaced
  25. bought new alloy pedals (Autosport) to compliment the original three-spoke steering wheel plus the pedals in the Fairlady didn't have pads anymore...the alloys look great - more retro! (bought it from Ace Hardware and it's super cheap @ P179! it's so cheap it's almost a crime!)...although have yet to install them
  26. had all valves adjusted - .0169 clearance (hot) and the valve cover cleaned with Whiz Carburetor Cleaner to remove all the gunk and oil that stuck inside *click here for the internet resource

Photos of the OEM Nissan hardtop


Monday, February 13, 2006


Project Time Machine is the restoration project (currently ongoing - thanks James for the blog idea) of my 1965 SPL-311 Datsun Fairlady which I acquired (anxiously) on the 10th of January, 2006. I saw this classic on eBay.ph last December and for some reason it got stuck in my mind...never to be forgotten...really. My friend, Mig, helped me pick up the Fairlady from Rizal. Luckily I managed to bring the roadster home safely...almost hit another car in an intersection as the roadster, didn't have stopping power...felt like it didn't have brakes at all! The engine ran well...didn't overheat even with the heavy traffic in some parts of Marikina. That was one adventure!

The thought of making a dream a reality was just too much for me to contain. And on December 24, 2005 I met with the owner and saw the beauty for th first time...WOW! The body is in excellent condition (a bit rusty yes, but hey it's a forty-one year old car!)... the chassis is straight, body panels are smooth and aligned, interior including the original leather seats are still in good condition, the "uber-retro" gauges (except for the oil pressure gauge and amp meter) and toggle switches are still the original ones, soft top and hard top still intact and functional, the vintage 14" rims are equally hard to find (although the center hub caps are missing), and astonishingly the engine is still the original 1.6 liter R16 96BHP Datsun motor that came with the car...and it runs great! In other words, this car is one heck of a find! So the only problem was changing the engine oil...or so it seemed!